Saturday, September 24, 2011

Ah, The "Musical Fruit!"

Bean seeds to be planted for next year's bean crop

Many of the green beans that I planted in June and did not pick with the intention of saving them for next year's seed are just getting to the stage when they need to be picked, dried and stored. Beans are some of the easiest things to save seed from!  Simply leave the beans on the plant until the pods start to turn yellow and dry, then pick, shell, dry a little more and store them in an airtight container in a cool, dark place.  I've read that it's a good idea to place them in the freezer for a short time to kill any bugs that may be inside, but I never do and have never had a bug problem....knock on wood!

I think part of my fascination with beans is the fact that they can be so varied in color, shape and size.

Some of the beans I recently harvest for seed.  White bean is the pole bean "Helda".  Black bean is a bush bean called "Cherokee Wax", and the red bean is another bush variety, "Provider"

Getting the timing right on picking the bean pods intended for seed use can sometimes be tricky.  Our weather this year has been extremely wet which has resulted in some of the beans rotting, getting moldy, and sprouting in the pods!  I decided to pick many of the beans before the pods are completely dry in an attempt to avoid the mold/rot/sprout issue.  Hopefully that doesn't adversely affect the seed quality. (I seem to remember writing something similar about the popcorn I recently harvested!)

Helda beans with two seeds already sprouting in a still-green pod!

Helda seed sprouting....aw, look at those little roots...I'm assuming they're little roots since the leaf portion is still in the seed!

You know, maybe that Jack & The Beanstalk fairy tale isn't so far fetched...you know how the mother tosses the bean seeds out the window in despair?  And the next day there's a beanstalk growing up into the clouds?  And the seeds weren't even "planted" in the soil, yet they grew?  Well, perhaps my Helda beans are a relative of Jack's beanstalk, seeing how it's so anxious to grow and it's not even planted ;-)   Those bean stalks did grow pretty high!


Monday, September 19, 2011

Spuds + Floods = Duds

I planted 6 varieties of potatoes on June 16 of this year.  I like to plant potatoes a bit later than the average bear normally would because this way the Colorado potato beetles don't seem to be the astronomical  problem. that they typically can be.  That being said, I actually had more CPBs this year than I've ever had, for some reason.  Interesting.  I don't normally have issues with them.  

The six varieties of potatoes that I planted (and they were all from saved potatoes from last year) were "All Blue", "Buttercream",  "Yukon Gold", "Red Norland", "Red Gold", and a red-skinned white potato that was particularly tasty that I got from an organic foods co-op.  Once planted, the potatoes grew as they should, and eventually the foliage started to die back not too long ago which is a sure sign that the potatoes are mature and ready for harvest.

So, I set about digging my potatoes this past weekend....
But!  Two weeks ago we had major flooding here in Central Pennsylvania due to Hurricane Lee (later-turned-tropical-storm Lee).  We got 15 inches of rain in 2 days and the flooding was devastating.  Our own little house was spared the ravages of the flood only because we had 2 sump pumps running constantly in the basement for several days, and our stream crept closer to the house than I've ever seen:  11.5 feet away  from the front of the house.  The garden was under water for a spell and the potatoes, apparently, didn't like that one bit.

Reports from local potato farmers are of devastation to their crops.  A friend of mine said 50% of his potatoes were destroyed by the flood, which is what I calculated to be my loss to be.

What originally appeared to be good potatoes were later discovered to be rotting once a bit of pressure was put on the spud.

When I began digging my potatoes I was horrified to discovered one rotten potato after another.  I could imagine what the Irish potato famine victims must have been thinking as they discovered their crop ruined.  I would find what I thought were perfectly good potatoes, but upon lifting them from the earth found that their insides were liquefied, or mostly so.  The slightest pressure on the potato caused the release of a foamy white vile stench of a liquid.  Yuck!

When I started digging my All Blue potatoes, I was startled to find brilliant purple and blue "smears" in the earth where healthy potatoes once thrived.  The colors were so vibrant it makes me wonder how purple potatoes would do as a natural fibers dye.

Former "All Blue" potatoes

My potatoes are now all dug, and I have a very small crop to use as food.  The rest I shall set aside as seed potatoes for next year.  I'm keeping my fingers crossed that the chosen seed potatoes keep through the winter and don't spoil as I'm not certain that they're perfectly healthy just yet.  Time will tell.

Saturday, September 17, 2011

Popcorn!


Some of the ears of Calico popcorn that I recently harvested

I've gardened for many, many years, but this is the first year I've grown popcorn.  Part of the reason I've not grown it before now is I just didn't have the room for it, OR sweet corn, but this year we created a new garden space which has opened up quite a bit of garden real estate for us.   My dad grows popcorn once in a while, and I remember evenings at home, helping to shell some popcorn (usually Strawberry Popcorn) so we could pop it.  He often had popcorn on the cob hanging decoratively on the fireplace in the living room, and whenever the mood for freshly-popped corn struck us, we'd grab an ear or two, shell it and pop it!

I had a spot in the garden where I'd planted some winter rye last fall, and that is where I decided to plant two varieties of popcorn: Calico, and Early Pink.

Calico, one of the two varieties of popcorn I planted this year
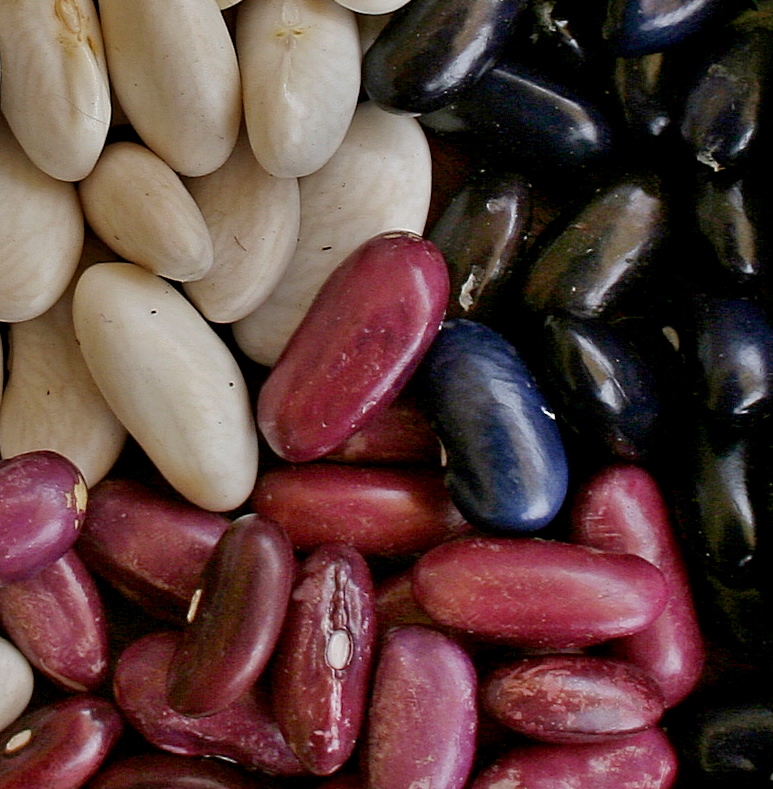
Calico popcorn seed

Earlier in the spring I cut the rye back but didn't till the area, so it looked something like a lawn. I wanted to experiment with planting directly into the un-tilled rye stubble figuring the cut rye would act something like a mulch.  So, I grabbed my hoe and went to work digging the necessary trenches for the seed.

Planting directly into the rye stubble

Once planted, I only had to wait 3 months before picking time, and that happens to be right now!


Why hello there, Mr. Calico Popcorn!

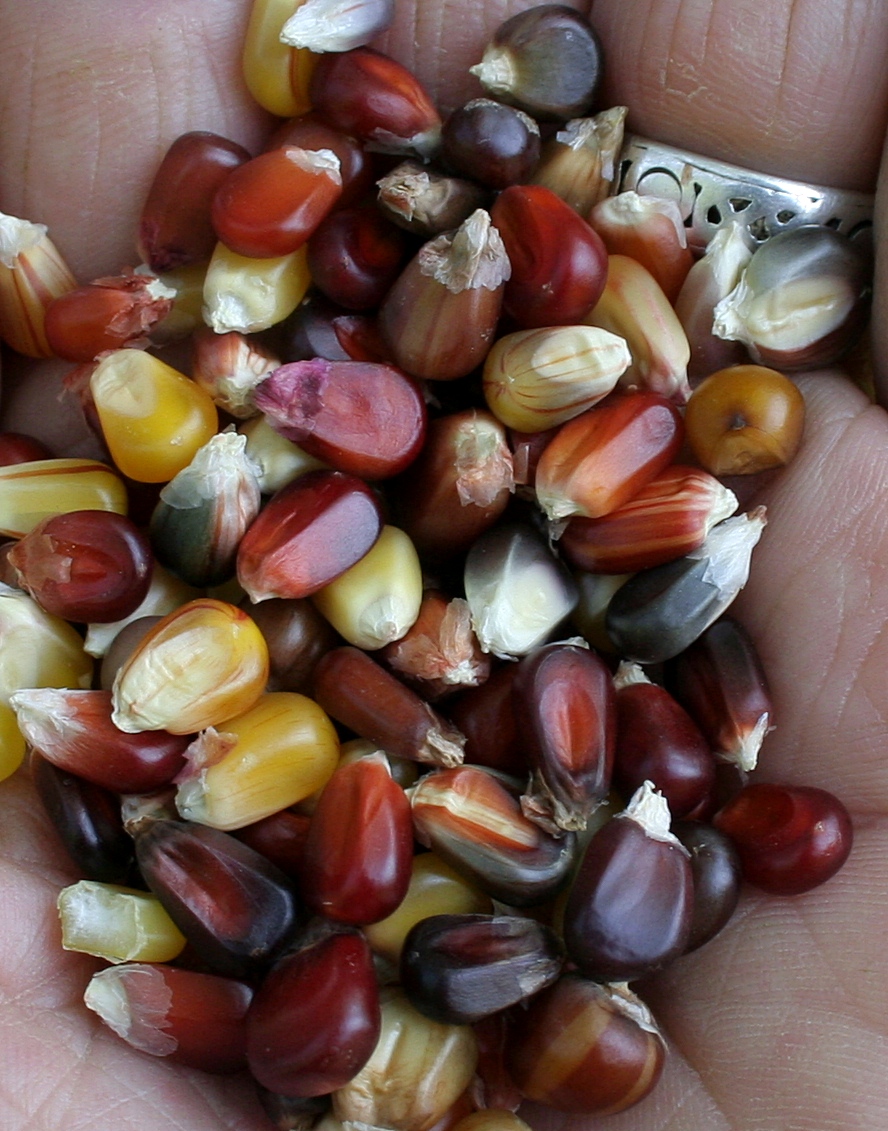
It's fun to shuck the ears of popcorn and see what color is waiting beneath the layers of husks.  The colors are intense and gorgeous!  No human could create colors so extraordinary!

Calico Popcorn


 The colors remind me of jellybeans!  I can almost smell jellybeans....

Early Pink Popcorn.  I think it crossed with the Calico...And these colors are stunning, too!


Another shot of the variety of colors of Calico popcorn 

A lot of the popcorn that I picked could have dried a bit longer on the stalk, however, we've had so much rain lately that some of the corn was beginning to mold.  I didn't want to take the chance that many more of the ears would succumb to mold, so I picked some before their time.  The husks were mostly dry, but not completely so...hope that doesn't make much (if any) difference in corn quality.

An ear of Calico popcorn that is beginning to mold

The following excerpt on growing/storing popcorn was taken from the Horticulture and Home Pest News:

"Popcorn is grown for its tasty, exploding seed. Heating the kernel converts the moisture inside the kernel to steam and turns the seed inside out. The quality of the end product depends on the conditions during growing, harvest, and storage.

Growing

Several different varieties are available to home gardeners. Be sure to select a variety that will mature in your area. Sow seed directly in the garden in spring in several short rows. This ensures good pollination. Thin as recommended on label directions. Do not plant sweet corn in the same garden with popcorn. The quality of the sweet corn will be reduced if it is cross-pollinated by popcorn.
Water, fertilize, and weed regularly. Any serious stress like water deficiency can greatly reduce yields and the quality of the popcorn.

Harvest

Allow the kernels to dry in the field as long as possible. When harvested, the kernels should be hard and the husks completely dry.
After harvest, remove the husks and place the ears in mesh bags and hang in a warm, dry, well-ventilated location. The ideal moisture content for popcorn is between 13 and 14%. Once or twice a week, shell a few kernels and try popping them. When the test kernels are popping well and tasting good, shell and store the rest of the kernels. If the popcorn is "chewy" or the popped kernels are jagged, it is too wet and needs to continue drying.

Storage

Store the kernels in sealed, airtight containers. If stored properly, popcorn should retain its popping quality for several years. Unshelled corn should be stored at temperatures near 32F and high relative humidity. The storage location should also be rodent proof.
If stored popcorn fails to pop, it may be too dry. Add 1 tablespoon of water to a quart of popcorn. Cover and shake at frequent intervals until the popcorn has absorbed the water. After 3 or 4 days, test pop a few kernels to see if it is ready. Add more water and repeat the process until the popcorn pops well."

Monday, September 5, 2011

After The Rain

Rain fell overnight and early this morning.  I love to wander through the gardens here at Cairnwood Cottage in the morning after a rain...
This morning glory on the arbor at the entrance to our patio seems to be glowing from the inside out.  Viewed from below.

Morning glory and spider's web on the arbor at the entrance to our patio this morning

Close-up of the arbor/spider web morning glory

Little green cherry tomato basking in the morning rain

Gladiolus 

Sunday, September 4, 2011

Speaking of Beans....


A few of the jars of green beans I've canned this year

I like green beans.  A lot.  If I could plant only one thing in my vegetable garden, it might be green beans (string beans/snap beans).   I like them frozen.  I like them canned.  I like to eat them, Sam-I-Am.

This year I planted 10 varieties, and a lot of them.  As you can imagine, I've got green beans coming out my ears!  Some years I have problems with bean beetles, but thankfully they've not been a problem this year.  I'm making plans for next year, saving seed and deciding which beans are worth saving and which are not.

Beans worth saving and planting a ton of  next year:  HELDA.  This is the first year I've grown Helda pole beans.  Someone on my organic gardening list mentioned them and they sounded intriguing, so at the last minute I ordered some from Territorial Seeds.  I have nothing bad to say about these beans.  As I mentioned, they're pole beans and quite vigorous growers.  They produce huge pods that don't fill out and get "beany" until late...I really don't like green beans that have big old seeds in them; I'm a pod person.   It's not unusual to get 10 inch beans that are STRINGLESS and tender.  Yes, stringless!  They're a Romano type bean.  Positively lovely!  

 One HELDA pole bean, 10 inches long, not at all unusual!

 
 HELDA pole bean

Next year I'm going to create an arbor where the beans can grow up and over so that the ripening beans will hang down for ease of picking.  I can see it now....a shady tunnel walk with massive beans within easy reach.  Sigh.  And these beans produce and produce and produce!  One tepee of beans this year has produced an amazing amount of beans for me.


HELDA pole beans are prolific producers!  I planted one tepee of them around a compost bin--here is a "nest" of beans waiting to be picked

SEQUOIA.  I've been growing these beans for quite a few years.  They're a purple-podded bush bean of the Romano type.  Again, stringless.  I honestly don't have the time to fiddle around with stringy beans, so if they're not stringless they don't get planted here again.  I love purple podded beans, which, by the way, turn green once cooked.  They're easy to pick because they stand out from the green foliage, and I'm sure they must have more antioxidants that their green counterparts.  And they're just so cool looking!  Sequoias have a good flavor and don't get overly beany until they get old.

I'm also growing GIANT STRINGLESS , a bush bean, green, and as their name suggests, stringless.  PROVIDER is another that I'll be saving seed for to plant again next year: bush, green, stringless.

Saving bean seeds is a snap.  Simply let the bean grow out and dry on the plant.  Shell the seeds from the pod, let dry a bit further and store in an airtight container in a cool, dark place, then plant next year and repeat.

Saturday, September 3, 2011

"The Kitchen Is Full of Grape-y Goodness"

Concord grapes ready to be made into wine!

So, I finally got around to picking the Concord grapes.  I should have picked them last week, but I was just too busy/tired.  Rain is predicted for later in the day, and I simply had to get out there and pick grapes!  I have a newly-planted vineyard of 10 vines (mostly Concord and Niagara), but they're too young to produce just yet.  The grapes that I picked today were from one vine that I healed in about 18 years ago when I'd got the vine but didn't know quite where I wanted to plant it.  I stuck it in the ground and never did figure out where to put it, and there it's stayed all these years.  It's currently climbing up into an apple tree and has wild blackberries growing all around and through it.

Grapes climbing up and into an apple tree

 Needless to say, the grapes are a major pain, literally, to pick.  The constant jabbing of the blackberry thorns is a grim reminder that when I buy something, I really need to know where I'm going to plant it!

The grape vine, apple tree and blackberries create quite a jungle, and apparently birds have found it to be a safe and secure place to raise their families.  It does seem impermeable to predators of all sorts!  I had a very difficult time getting that close to this nest:


Bird's nest and wormy apple!

So, grapes are picked, a 5-gallon bucket of wine is in the works, and I made about a gallon of Concord liqueur with the remaining grapes.  Now, we wait....

Saturday, August 20, 2011

When I Am An Old Woman...

Royal Burgundy (left) and Sequoia bush beans

When I am an old woman, I shall pick purple beans and put them in a red colander....

Sunday, August 7, 2011

Gee, Have I Ever Mentioned That I Like Free Stuff?

 Free bricks!
 In case  you missed it the first time, I like free stuff!  Freecycle is an amazing thing, and a network that I use often, both to give things away that we no longer need, and to receive things that I need but don't really want to spend a bunch of money on to purchase.  As their website states:  "It's all about reuse and keeping good stuff out of landfills."  Rather than throw it away, why not give it to someone who can use it?  Today I scored a truckload of approximately 400 free bricks.  These weren't a Freecycle find, but rather the friend of a friend gave them to us.  I have so many things I could do with these bricks:  wood-fired brick oven, greenhouse base, edge walkways, raised bed edging, outdoor fireplace, etc. etc.  They won't go to waste, and there's not nearly enough to do everything I'd like to do with bricks!


Used greenhouse plastic

 Another recent freebie item that I scored was a bunch of used greenhouse plastic.  A friend of ours has a large greenhouse business, and he has to replace the plastic every 5 or 6 years or thereabouts.  That's a LOT of plastic that would end up in a landfill somewhere!  He tries to place it in new homes....we got two piles of it for use on my future hoop house.  I can think of several other things to use it for too, but the hoop house is my first priority.  I realize it won't last as long as if it were new, but it can be replaced every couple years, free, if need be.

 New step leading up to my compost bins 

 For years I've been wanting to put a step into a small slope that leads up to the compost bins from our back yard.  Earlier this spring while wandering through the woods, I found the perfect rock....big, nice and flat.  I lugged it down to the house and finally just last week got my rear in gear and dug it into the little slope.  It looks nice there, it's nice and level, and now I don't have to worry about slipping and falling on my behind when I trudge up to the compost bins when the grass is wet.  Sweet...another free item.

Now if we can just find the time to create everything out of these freebie items (bricks, plastic) that need creating....

Munch!

Climbing Cécile Brunner rose--post munch
Sometimes gardening can be very frustrating, and I often find myself pining for The Garden of Eden...what must that have been like before humans screwed it up?  I often imagine that Heaven must be a garden of Eden sort of place...anyway....

Yesterday I was admiring a perfectly formed bud on my climbing Cécile Brunner rose.  It was about to burst open, and since I just got this rose I'd never seen its blooms before and was anxious to see the rose unfurled.  Today when I spied the rose....horrors!  Something has munched it!  See above photo.  The rose smells divine, but it looks like it's been through a war zone.  Sigh...

Green tomato "Early Girl"---post munch

 Another "Early Girl" tomato---post munch

Then I walked out to check on my chickens.  I sneak a peak at the tomatoes I have growing from hanging pots every time I go out there since they're right on the way.  Yesterday, these tomatoes were perfect green dudes waiting to ripen.  Today....something's munched them!  See above photos.  Sigh....

What flattened my corn?!

And yesterday morning my corn was looking fine and dandy.  Then we got a little rain and a slight breeze.  I looked across my corn patch and much to my horror....where'd it go?!  Upon closer inspection it appears to have been flattened by either the breeze or water weight from the rain.  See above photo.  It doesn't seem to have been uprooted, but rather just bent over in some places.  Some stalks are actually snapped right off mid-way up or near the top.  I know planting the seeds at the wrong depth can make corn fall over, as can various grubs that attack the root, but this stuff seems bent.  I'm hoping I can prop it up, perhaps...Sigh....

Well, at least we got some rain!

Saturday, July 23, 2011

More Freebies

Tiger lily...or mysterious sea creature?
 Years ago a friend dug up a start from one of his "wild lilies" that he had growing on his property, and gave it to me.  I planted it near my Secret Garden, and they've been growing happily ever since.  I love these "wild lilies" ("tiger lillies" or "Lilium Tigrinum")...their brilliant orange contrasts vividly with dark brown spots.   And they look all the world like some kind of sea creature...a type of jelly fish or an octopus.


These lilies spread readily and are low maintenance, though they don't like this drought-y weather we've been having.  And I love how those little seeds just sit there at the junction of leaf and stem. 
View from below... Notice the seeds at the stem/leaf junction

 Canoe?!

 And what's this?  A ready-made canoe for a very small fairy-like creature sits at the end of each pistil!

I Love Free Stuff

Freebie beans saved from the plant that resulted from one lonely seed...

Sooo, one day at work back in late winter, a package came through the system that had popped open and dried beans from a seed packet spilled.  The beans were carefully put back into the packet and then into the package and continued on its way.  An hour or so later, I noticed a lone bean seed lying on the floor....

Rather than toss the lonely legume into the trash, what can a saver of seeds, such as myself, possibly do other take it home and plant it?!  I planted the little bean along with other seeds that I was starting for the garden, and when it was big enough I planted it in a corner of the asparagus/strawberry bed, all by its lonesome little self.  It grew like a bean possessed, and soon I had a nice crop of green beans (bush) and very early in the season since I started the little guy indoors well before our frost-free date.  Curious, I tasted one bean.  Very nice and stringless.  I let the rest mature, and now I've got a nice little pile of bean seeds to plant out next year.  There are still a few beans maturing on the plant, but I'm guessing I'll end up with another 20 or so bean seeds in addition to the 88 that I already have.

I wish I would have taken note of the packet of beans so I'd know what kind these are; they're probably something like Bush Blue Lake or another popular bean.  I'll always know them as "Work Beans."

Friday, July 22, 2011

Chickens In The Mist

When someone says, "hot chicks", is this the image that pops into your mind?  If not, it will be now!
With current temps in the 100 degree F. range, The Girls are probably wishing they didn't have quite so many feathers, and lucky is the one currently molting!  I do worry about them when it gets this warm, and egg production can suffer greatly when they get overheated.  Last year I came home from work in the midst of a heat wave and found an otherwise healthy hen lying dead on the coop floor under the roost.  It looked as if she just fell off the roost in her sleep.  I made several phone calls (vet, extension agent) to see if I needed to have a "chicken autopsy" done, and it was suggested that no, it was probably due to the heat.  That certainly opened my eyes to the perils of hot weather for the chickens.

You can tell when your chickens are too hot by the way they stand around with their little beaks open and their wings held away from their bodies.  Chickens don't sweat, and like dogs they need to pant to cool themselves off.  See above photo.

Photo of the thermometer in our kitchen.  This monitors the outside temps just outside the window...in the shade.  Photo taken today (July 22, 2011)


Here are some of the things I've been doing to help my girls stay cool.
(1)  I make sure they've got plenty of shade.  The coop and chicken run are in the woods, so this really isn't an issue.
(2)  I make sure they have plenty of water.  Chickens don't like warm water and will forgo drinking it if it gets too warm.  I change their water several times a day to make sure it's cool, AND/OR add ice to the water.  If you're able, freeze a block to toss into your chickens' water.
(3)  When I have "treats" for them, such as old fruit or vegetables, I toss these into the freezer and freeze them solid before feeding to The Girls.  They love pecking at these cool treats....is this the chicken equivalent of ice cream?!
(4)  I hose down a section of their run so they've got cool mud to walk through.
(5)  I set up a mister so they can hang out in the mist ("Chickens In The Mist")  They seem to love this.
(6)  I have a fan sucking warm air out of the coop...this is especially important because their coop is on the small side and with 31 chicken bodies in there at night, it warms up fast.
Guinevere taking a turn in the mist
Bandito cooling off in the mist, with Guinevere shaking like a wet dog


I'm trying to keep the girls cool so I get more of these...

Tuesday, July 19, 2011

Where For Art Thou, Rain?

Sweet pea after the rain...
Yesterday we got a little rain in the evening and through the night.  It wasn't much, though, and today I had to grab the hose and water things that were beginning to wilt.  We just got enough to make things very, very humid.  We had a very wet spring, and I thought it would never stop raining!  We could certainly use some of that excess rain at the moment, however.

I just got chased into the house by a thunderstorm.  The sky is dark, there's lots and lots of thunder, the breeze picked up and cooled the 88 degree F temps down to a chilly 78.  Right.  Chilly...Rain drops have begun to fall, but they're few and far between.  I hope we get more than we did last night, otherwise this dog's bark will certainly be worse than its bite.

The above sweet pea was photographed yesterday after a bit of rain fell.   I think this sweet pea variety is  "King of the Blues" (I'd have to unearth my records to know for sure!) Click on the photo to enlarge it...that lavender bit that hangs down to the left reminds me of a Walt Disney-style ball gown, swooping across the dance floor, bedecked with sparkling raindrop jewels. 

Oh, Those Blasted Hornworms!

Why, hello there, Mr. Hornworm


OK, I'm really tired of the hornworms devouring my tomato plants.  Last year I had more hornworms in the garden than I've had in all previous years combined, I think.  Last night while looking at the garden, I found two hornworms and saw a good bit of hornworm damage (tomato limbs completely denuded of their leaves).  I always called these guys "tomato hornworms", but according to the following Wikipedia article, they're actually  "tobacco hornworms":


"The Five-Spotted Hawkmoth (Manduca quinquemaculata) is a brown and gray hawk moth of the Sphingidae family. The caterpillar is often referred to as the tomato hornworm and can be a major pest in gardens. Tomato hornworms are closely related to (and sometimes confused with) the tobacco hornworm (Manduca sexta). This confusion arises because caterpillars of both species feed on the foliage of various plants from the family Solanaceae, so either species can be found on tobacco or tomato leaves, and the plant on which the caterpillar is found does not indicate its species. The larvae of these species can be distinguished by their lateral markings; tomato hornworms have eight V-shaped markings while tobacco hornworms have seven diagonal lines.[2] Furthermore, the caterpillars can be distinguished from the larval stage onwards by the color of the horns on their back ends: M. quinquemaculata caterpillars have black horns, while Manduca sexta caterpillars have red horns. The moths can be distinguished by the number of spots on their abdomen, with M. quinquemaculata having five."

One good thing about the hornworms....my chickens love them.  Whenever I find one that's not covered in parasitic wasp larvae, it gets fed to the girls.  If I see one with the wasp larvae clinging to it, I leave it alone so the larvae can mature and continue the cycle. 


Hornworms can be very difficult to find in amongst the tomato plants (or peppers, or wherever they happen to be feeding).  I normally spot the  hornworms first that are covered with the rice-like parasitic wasp larvae, then look a bit further and discover the rest.


 Hornworm playing host to parasitic wasp larvae.  I'll leave these guys alone so the larvae can mature and produce more parasitic wasps.

 Good riddance, evil hornwom!  I found this deflated fellow on a tomato cage as I was cleaning up garden debris last autumn.